First-time setup
When you sign up for ReferralPulse, the first thing you see is a four-step profile wizard. The goal is to fill in enough about you and your business that your assistant can start being useful from the first day, then point you at three or four ways to bring in your existing partners. Most people finish this in under ten minutes, less if your profile prefills from LinkedIn or the Provisors directory.
Where to find it
Where to find it: First-time signup lands you here automatically. Direct URL: /dashboard/profile?mode=new. The page header reads Welcome to ReferralPulse and a step counter (Step 1 of 4) sits in the top right.
If you skipped the wizard the first time and want to come back, you can reach the same screens at any time from Avatar → Profile (which opens in edit mode rather than new-user mode). The structure is the same, just without the welcome framing.
What the four steps cover
The wizard is built so you can skim, take any prefill shortcut available, and edit only what looks wrong. The four steps are:
- Step 1: Your basic info. Name, email, company, title, type of business, mobile, headshot.
- Step 2: Business details. Expertise, ideal customer, what makes you different, who you want to receive referrals from.
- Step 3: Preferences. Profile visibility, notification settings, AI preferences. Skipped automatically if you're an existing user editing your profile.
- Step 4: Build Out Your Network. Bring in your first batch of partners through any combination of calendar, CRM, file upload, or manual entry.
A progress bar across the top tracks how far you are. Save persists your progress and lets you come back later. Next moves to the next step.
Methods
Take the LinkedIn or Provisors shortcut on step 1
Where to find it: Step 1, the colored card above the form fields.
If your profile is on LinkedIn, the fastest way to fill out the wizard is to paste your LinkedIn URL once. Your assistant pulls in name, headline, company, location, and most of the business details for step 2. You spend the rest of the wizard reviewing rather than typing.

- If you signed up with a LinkedIn URL on file, the prefill happens automatically in the background. You'll see a blue Still finishing up from LinkedIn banner while it's working, and a green Prefilled from your LinkedIn profile banner once it's done. You can start filling in fields manually before it finishes, the prefill only fills blanks.
- If you didn't have a LinkedIn URL on file, the Take a Shortcut! card at the top of the form lets you paste one and click Fill My Profile. It takes about 20 seconds.
- If you're a verified Provisors member, the shortcut card switches to Pull from your Provisors profile, in green. Your Provisors directory entry already has your name, company, networking groups, and more, and your assistant fills in any blank fields. You can also reveal a fallback Or auto-fill from LinkedIn URL option underneath if you want to combine sources.

Both prefills only fill blank fields. If you've started typing into a field and the prefill arrives later, your typing wins. You can stack the two sources, run Provisors first then LinkedIn, and each one only adds what the other didn't.
Fill in business details on step 2
Where to find it: Click Next at the bottom of step 1, or use the Business Details tab if you skipped step 1 prefill.
Step 2 is where you tell your assistant what you actually do, who you want to work with, and what kind of partners you want in your network. Your assistant uses this throughout the app to suggest partners, surface gaps in your network, and pre-write intro emails on your behalf.
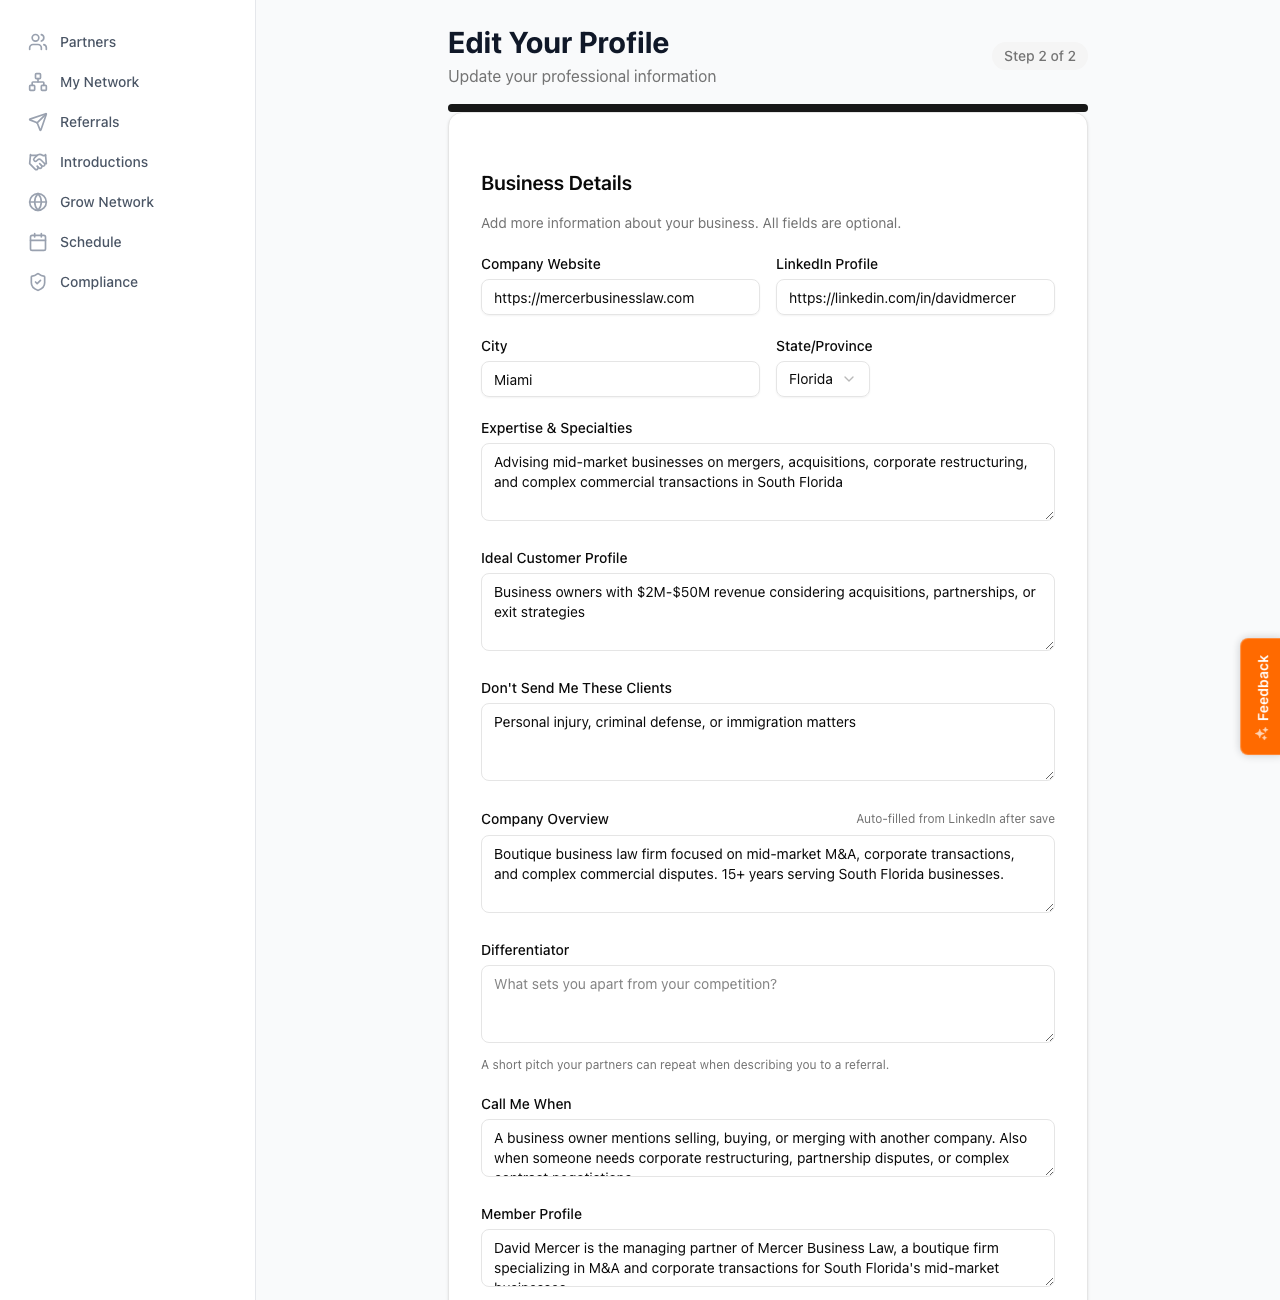
The fields, in order:
- Expertise and Specialties. A short paragraph on what you're known for.
- Ideal Customer. Who's the best client for you. Include details (industry, deal size, life stage) so your assistant can recognize a match.
- Not the Ideal Customer. Who you'd rather pass on. Just as important as ideal, because your assistant uses this to filter intros.
- Company Overview. Two or three sentences on your company.
- What makes you different. The differentiator you'd say at a chapter meeting.
- Call me when. Trigger phrases that mean someone needs you. Used in pre-meeting prep briefs.
- Member profile, industries served, services offered, service areas, languages spoken. Long-form structured fields used across the app.
- Networking groups. Provisors, BNI, chambers, etc.
- Desired Referral Partner Types. A checkbox grid of professions. This is the most important field on this step, see below.
The Desired Referral Partner Types field shapes everything your assistant does for your network. It drives gap-finding (which professions are missing from your network), partner recommendations, calendar candidate suggestions, and intro-pair suggestions.
Most people undersell this section. If your ideal client is a founder selling their company, the partners you want in your network are M&A attorneys, valuation specialists, wealth managers, and tax CPAs. Pick 8 to 12 types that actually serve your clients, not just the obvious ones.
Set your preferences on step 3
Where to find it: Click Next at the bottom of step 2.
Step 3 is the shortest. Three sections:
- Profile Visibility. Discoverable (anyone using ReferralPulse can find you), Network Only (only your connected partners see you), or Private (only you see your profile). Default is Discoverable for new users, which is right if you want to grow.
- Notification preferences. Master toggles for email, in-app, and push.
- AI preferences. Tone (Professional, Casual, Friendly, Formal) and email style (Brief, Detailed, Warm and Personal). The defaults are fine for most users. You can change these any time in Settings.
If you'd rather come back to preferences later, click Skip for Now at the bottom and the wizard moves to step 4.
Don't agonize over step 3. The defaults are sensible, and every option is one click away in Settings if you want to change it later.
Bring in your first partners on step 4
Where to find it: Click Next at the bottom of step 3, or jump straight there with Skip for Now on step 3.
The last step is the network seed. The page is titled Build Out Your Network and offers six methods:
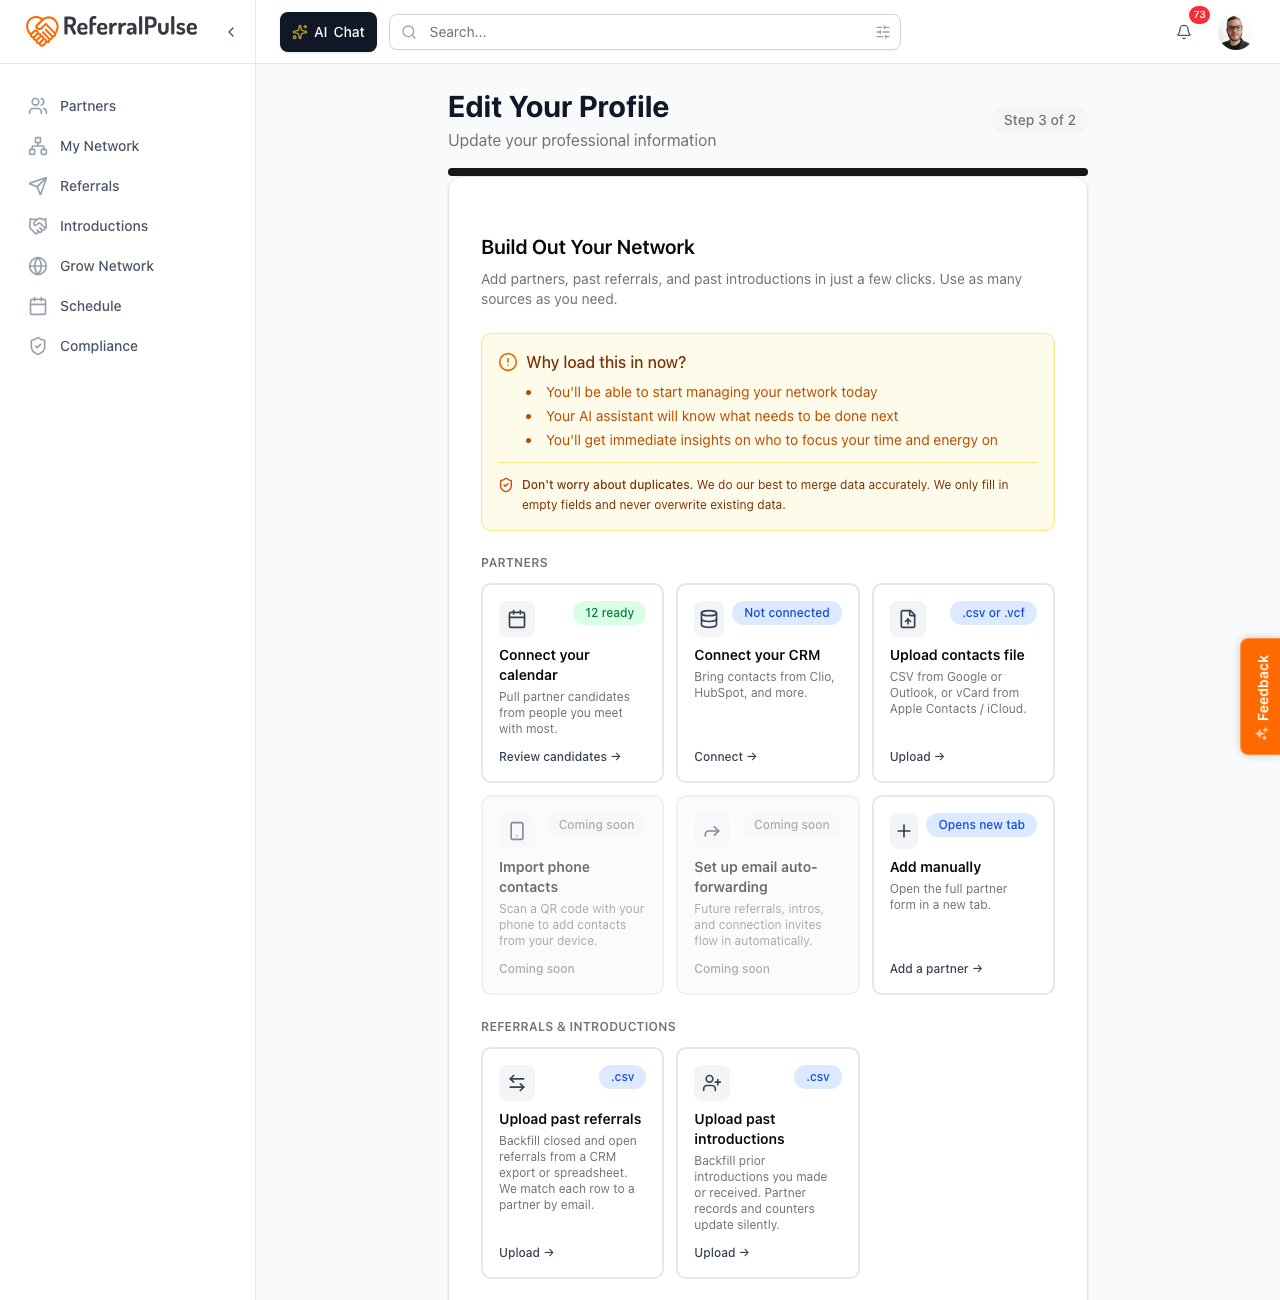
You can stack any combination, the screen doesn't make you pick one. The most common path for someone with a busy calendar is Connect your calendar first (lots of high-quality candidates), then Upload contacts file to fill in anyone who isn't on your calendar but is still important.
For the full breakdown of every method, see the How to add a referral partner article.
You don't have to add everyone right now. Aim for 10 to 15 of your most important partners in this first session. The rest you'll add over the next month as you log meetings and referrals. Quality over quantity.
What success looks like
When you click Finish on step 4, you land on a quick celebration screen and the app routes you to your daily briefing. From here, three things will get you the most value out of your first week:
- Open the daily briefing each morning.
- Log your last few referrals (sent and received) so the dashboard has real numbers.
- Review the calendar candidates the app surfaces and add the ones who belong in your network.
For the full first-week tour, see Welcome to ReferralPulse.
On the iOS app
Where to find it: First-time signup on the iOS app routes you to the same wizard, in mobile layout.
The wizard is identical on phone, with a mobile-friendly stacked layout instead of side-by-side. The LinkedIn shortcut works the same way. The Build Out Your Network step is also where you'll connect your phone calendar permissions.
If you signed up on the iOS app, finish step 1 there but consider doing step 4 on a desktop. Connecting a calendar and reviewing candidates is faster on a bigger screen.